canvasでドロネー三角形分割を描く
前回はcanvasで三角形の外接円を描きましたが今回はそれを発展させてドロネー三角形分割を書いてみたいと思います。
ドロネー三角形分割とはなにかといいうとランダムな点を1頂点とする三角形を作ることが可能なのがドロネー三角形分割です。以下の完成サンプルを見てもらったほうが早いですが、流行りのポリゴンスタイルを実装するための手法です。(ES6で書いているためGoogle Chromeで確認してください)
See the Pen ドロネー三角形分割を描画5 by Kazuma Nishihata (@to-r) on CodePen.
順を追いながら解説していきます。
ステージにランダムなポイントを20個配置
前回のサンプルではランダムな3点を頂点とする三角形を描画しましたが、まずは、そこら辺の処理は削除してしまいランダムな20点を描画します。
const POINT_NUM = 20;//ステージ内にランダムなポイントを取得
var trianglePoints = [];
for (var i = 0; i < POINT_NUM ; i++) {
trianglePoints.push(new Point(
stage.x+Math.random() * stage.w ,
stage.y+Math.random() * stage.h
));
}
//ランダムなポイントを描画
trianglePoints.forEach((point)=>{
(new Circle(point,2)).draw(canvas.ctx,"red");
});See the Pen ドロネー三角形分割を描画1 by Kazuma Nishihata (@to-r) on CodePen.
この20点をベースにドロネー三角形分割を行っていきます。
ステージを包む外接円を配置
次にステージを包む外接円を配置する。これはステージ情報がから描画できるので難易度は高くない。
//ステージを包む外接円
var stageCircumscribedCircleRadius = Math.sqrt((stage.w*stage.w) + (stage.h*stage.h))/2;
var stageCircumscribedCircleCenter = new Point(stage.x+stage.w/2,stage.y+stage.h/2);
(new Circle(stageCircumscribedCircleCenter,stageCircumscribedCircleRadius)).draw(canvas.ctx,"green");
See the Pen ドロネー三角形分割を描画2 by Kazuma Nishihata (@to-r) on CodePen.
外接円を包む三角形を配置
更に外接円を包む外接三角形を配置します。円を包む外接三角形は正三角形になり重心は円の中心と同じなので比較的求めやすい。
var circumscribedTrianglePoints = [],
	circumscribedTriangles = [];
//ステージを包む外接円を包む外接三角形の頂点を取得
circumscribedTrianglePoints.push(new Point(
	stageCircumscribedCircleCenter.x- Math.sqrt(3) * stageCircumscribedCircleRadius,
	stageCircumscribedCircleCenter.y-stageCircumscribedCircleRadius
));
circumscribedTrianglePoints.push(new Point(
	stageCircumscribedCircleCenter.x+Math.sqrt(3) * stageCircumscribedCircleRadius,
	stageCircumscribedCircleCenter.y-stageCircumscribedCircleRadius
));
circumscribedTrianglePoints.push(new Point(
	stageCircumscribedCircleCenter.x,
	stageCircumscribedCircleCenter.y+stageCircumscribedCircleRadius*2
));
//ステージを包む外接円を包む外接三角形を作成
circumscribedTriangles.push(new Triangle(circumscribedTrianglePoints));
//ステージを包む外接円を包む外接三角形を描画
circumscribedTriangles[0].draw(canvas.ctx,"yellow");
See the Pen ドロネー三角形分割を描画3 by Kazuma Nishihata (@to-r) on CodePen.
ドロネー分割を実施
最後にドロネー分割を実施する。
ドロネー分割の方法はまずは追加する1点が配置されている三角形の外接円に含まれる場合その辺を1頂点とする外接三角形を描画する。
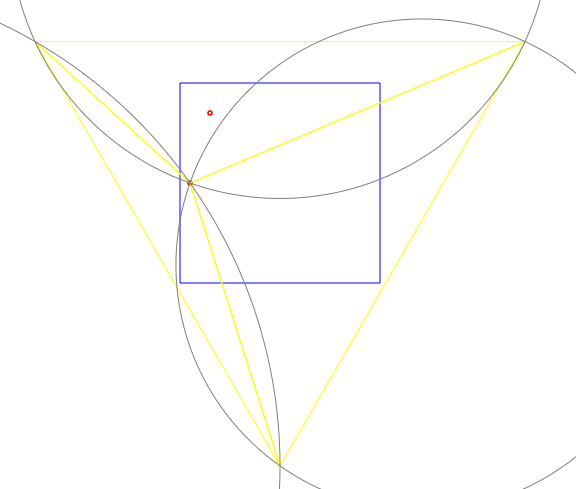
まず最初の1点目について考えてみましょう。
以下の様な座標にポイントがあるとします。
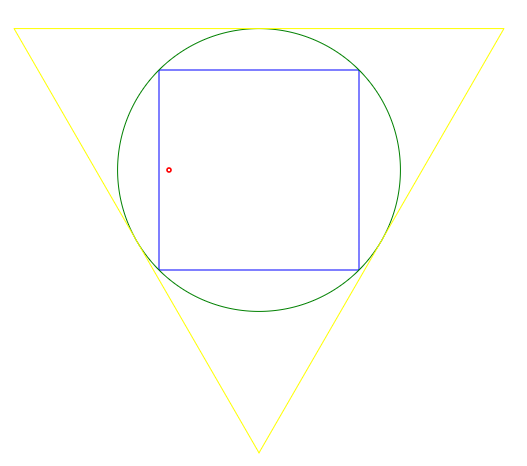
1点目は外接円に含まれているのは明白なのでそのまま分割してみましょう。
このように3個の三角形に分割できます。各三角形は外接円をもちそれを描画すると以下の様な感じになります。
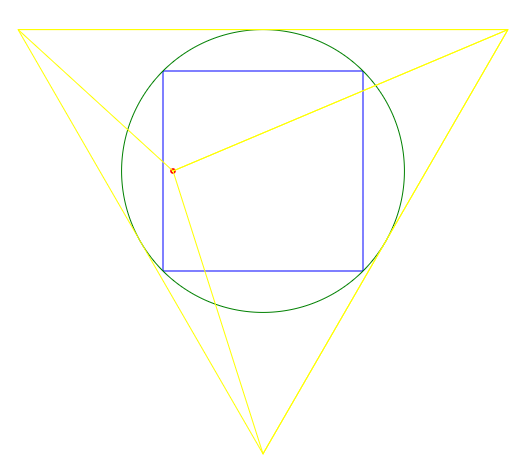
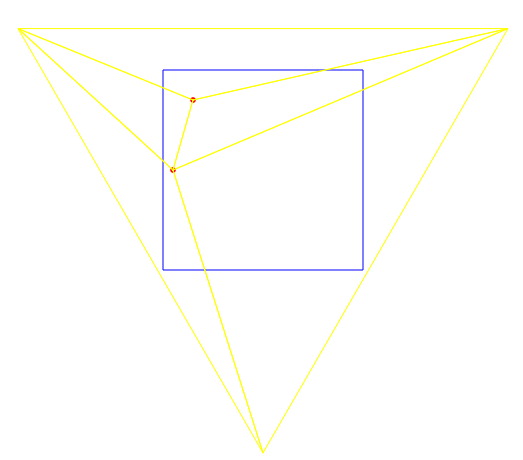
次点以降では、追加したいポイントが外接円内に含まれる場合にのみ分割を行っていきます。
たとえば2点目が以下の様な座標だった場合は上の三角形の外接円に点が含まれるので上の三角形のみを分割します。
わかりやすく外接円を取り除くと以下のように分割されます。
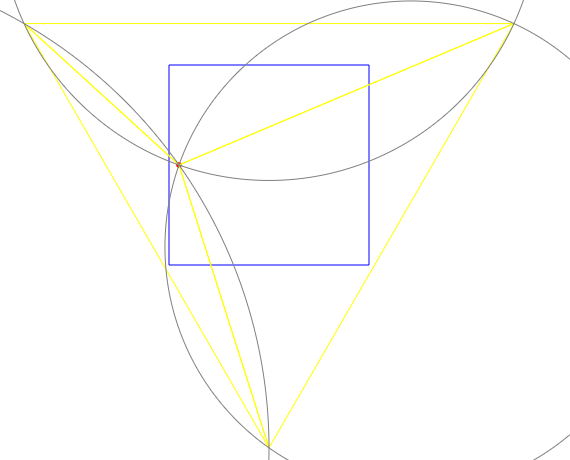
この要領で分割をおこなっていくのですが気にしなくてはいけないのが重複辺です。
例えば以下の様な2個の3角形の分割を行うと、
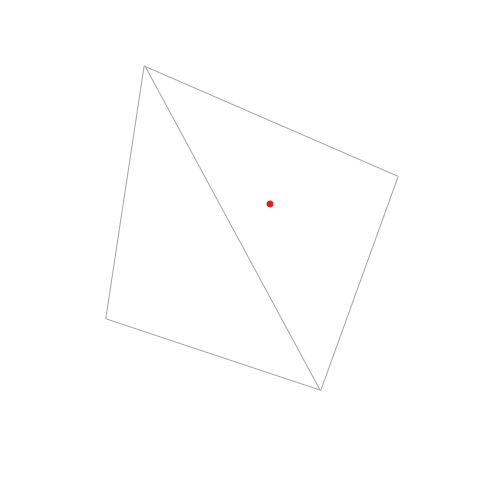
以下のように分割されてしまいます。赤の箇所が不要な辺となります。
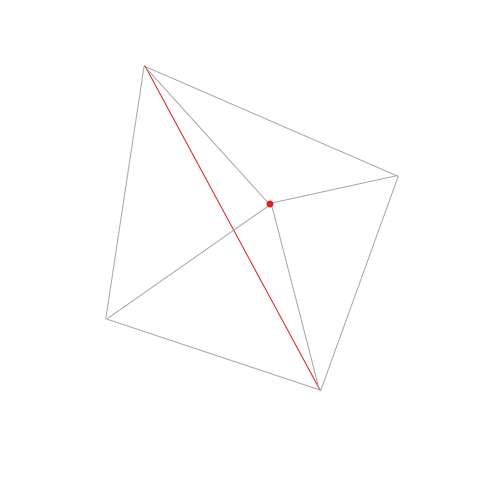
不要な辺は重複してているという特徴がありそれを取り除くことで不要な辺を削除することができます。
それらを踏まえてスクリプトを修正してきましょう。まずPointオブジェクトに同一ポイント化どうかを判定するisEqualメソッドを追加します。
/**
 * 座標オブジェクト
 * @param {number} x X座標
 * @param {number} y Y座標
 */
class Point{
	constructor(x,y) {
		this.x = x;
		this.y = y;
	}
	isEqual(point) {
		return (this.x === point.x && this.y === point.y);
	}
}
次に辺オブジェクトを新たに作成します。こちらは座標オブジェクトと同じようにisEqualメソッドを持ちます。
/**
 * 辺オブジェクト
 * @param {Point} start 開始座標
 * @param {Point} end 終了座標
 */
class Edge{
	constructor(start,end) {
		this.start = start;
		this.end   = end;
	}
	isEqual(edge) {
		return (
			(this.start.isEqual(edge.start) && this.end.isEqual(edge.end)) ||
			(this.start.isEqual(edge.end)   && this.end.isEqual(edge.start))
		);
	}
}
三角形オブジェクトに辺オブジェクト情報を取得するためのgetEdgesメソッドを追加します
/**
 * 三角形オブジェクト
 * @param {Array} points 座標情報
 */
class Triangle extends Polygon{
	/**
	* 外接円の取得
	*/
	getCircumscribedCircle() {
		(中略)
	}
	/**
	* 辺の取得
	*/
	getEdges(){
		//未定義の場合は定義
		if(!this._edges){
			this._edges = [];
			this._edges.push(new Edge(this.points[0],this.points[1]));
			this._edges.push(new Edge(this.points[1],this.points[2]));
			this._edges.push(new Edge(this.points[2],this.points[0]));
		}
		return this._edges;
	}
}
円オブジェクトに円内に引数の点が含まれているか確認するためのisIncludeメソッドを追加します。
/**
 * 円オブジェクト
 * @param {Point} center 中心座標情報
 * @param {number} radius 半径
 */
class Circle{
	constructor(center,radius){
		this.center = center;
		this.radius = radius;
	}
	/**
	 * 円内に引数の点が含まれているか確認
	 */
	isInclude(point) {
		var x = point.x - this.center.x;
		var y = point.y - this.center.y;
		var len = Math.sqrt((x * x) + (y * y));
		return len < this.radius;
	}
	/**
	* 描画
	*/
	draw(ctx,strokeStyle,fillStyle){
		(中略)
	}
};
最後にこれらのメソッドを元にドロネー分割を行います。
/**
* ドロネー分割
* @return {Array} ドロネー分割された三角形リスト
*/
var delaunayDiagram = (points,baseTriangle) => {
	//外部三角形を格納
	var triangles = baseTriangle
	//ドロネー分割
	points.forEach(function(point){
		var edges = [];
		var unique_edges = [];
		//ポイントを外接円に含む三角形を抽出、辺に分解
		triangles.forEach(function(targetTriangle,i){
			if(targetTriangle.getCircumscribedCircle().isInclude(point)){
				edges = edges.concat(targetTriangle.getEdges());
				delete triangles[i];
			}
		});
		//分解した辺リストから重複する辺を削除
		edges.forEach(function(edge0,i){
			var unique_flag =true;
			edges.forEach(function(edge1,j){
				//重複する辺がある場合
				if (i != j && edge0.isEqual(edge1)) {
					unique_flag= false;
				}
			});
			if(unique_flag){
				unique_edges.push(edge0)
			}
		});
		edges = unique_edges;
		//重複しない辺リストから三角形を生成
		edges.forEach(function(edge,i){
			triangles.push(new Triangle([edge.start, edge.end, point]));
		});
	});
	return triangles;
}
var triangles = delaunayDiagram(trianglePoints,circumscribedTriangles);
triangles.forEach((triangle,i)=>{
	triangle.draw(canvas.ctx,"gray");
});
See the Pen ドロネー三角形分割を描画4 by Kazuma Nishihata (@to-r) on CodePen.
最後の調整
これでドロネー三角形分割は完成ですが最後に微調整を行います。
ステージ情報を調整してステージをcanvas全体にします。ステージの描画も不要なのでコメントアウト
var stage = {
	x : 0,
	y : 0,
	w : 400,
	h : 400
}
//ステージを描画
// stage.obj = new Polygon([
// 	new Point(stage.x         , stage.y        ) ,
// 	new Point(stage.x+stage.w , stage.y        ) ,
// 	new Point(stage.x+stage.w , stage.y+stage.h) ,
// 	new Point(stage.x         , stage.y+stage.h)
// ]);
// stage.obj.draw(canvas.ctx,"blue");
ランダムなポイントにステージの4頂点を加えて、描画は不要なのでコメントアウト
trianglePoints.push(new Point(stage.x         , stage.y        ));
trianglePoints.push(new Point(stage.x+stage.w , stage.y        ));
trianglePoints.push(new Point(stage.x+stage.w , stage.y+stage.h));
trianglePoints.push(new Point(stage.x         , stage.y+stage.h));
// ランダムなポイントを描画
// trianglePoints.forEach((point)=>{
// 	(new Circle(point,2)).draw(canvas.ctx,"red");
// });
最後に描画する色を定義、三角形描画時に塗りを行います。
const FILLL_COLORS = ["#8AB3BB","#82A5AD","#8AB4BD","#92C1CB","#7CADB6","#97CBD5","#82A5AC","#8AB4BD"];triangle.draw(canvas.ctx,"gray",FILLL_COLORS[Math.ceil(i%FILLL_COLORS.length)]);See the Pen ドロネー三角形分割を描画5 by Kazuma Nishihata (@to-r) on CodePen.
これで完成です。
ドロネー三角形分割を理解するまで以下の3サイトに大変お世話になりましたので、こちらも合わせて参考にしてください。
- Tercel::Diary: ProcessingでDelaunay分割(解説篇)
- グラフィック - ドロネー三角形分割を自前で実装してみる - Qiita
- JavaScript で Delaunay 分割 ~ devlog

![Web制作の現場で使うjQueryデザイン入門[改訂新版] (WEB PROFESSIONAL)](https://images-na.ssl-images-amazon.com/images/P/4048913913.09._OU09_SCMZZZZZZZ_.jpg)
